Showing posts with label cake. Show all posts

Wednesday, December 31, 2008

Stollen and to all of you A Very Happy New Year 2009 !!


Baking Stollen or Christstollen at Christmas time is an age old custom and has a long tradition in Germany and some neighbouring countries, like the Netherlands (Kerststol). The shape of the Stollen is supposed to remind one of the swaddled baby Christ.
One of the cities well known for this tradition is Dresden and it was one of the first cities where this tradition of baking Stollen for Christmas has been recorded in different chronicles and earliest records date to as early as the 15th Century. Dresdner Stollen is also famous here in Germany and is considered to be one of the best recipes of Stollen.
Thanks to Ulrike of blog Küchenlatein I got to know that Dresdner stollen is a protected designation of origin (PDO) and can only then be called so when it is baked in and around Dresden. But what I could find out after asking bakeries who then call their stollen 'Dresdner Art' (i.e., made in a way like the Dressdner Stollen) is that is that there really are general guidelines which say when a stollen can be referred to as 'Dresdner Art' or something similar.
I had almost given up the thought of baking Stollen this time, but then finally decided on trying it out. It is my very first time. One can so easily get Stollen here that I hardly had the motivation to do it until now. Although, the thought has been on my mind since a couple of years now. Every bakery is offering Stollen during Christmas time. The supermarkets start selling them much earlier, in fact, as well as many of its new reincarnations - the cookie sized stollens. This Christmas I had not bought any Stollen, or for that matter bought a single Stollen at all. The Stollen season at the shops will also be over as soon as the new year starts. So, I thought "let me not break the tradition of eating Stollen at this time of the year and make my own" ;)
After searching through a couple of recipes in the net I saw this recipe (in German) which found my liking and got an instinctive "OK".

Stollen 'Dresdner Art'

Recipe by PG of My Kitchen Stories

Based on the recipe from www.weihnachtsbaeckerei.com (in German)

Preparation time: 1 day + about 1-1/2 to 2 hours
Baking time: 60 minutes

For 2 loaves

Ingredients:
500 g raisins (I used 300 g only + 100 g each of chopped dates and apricots)
200 g candied orange peel (orangeat)
100 g candied lemon peel
150 g peeled and chopped almonds
100 ml water
70 ml rum (i replaced it with 50 ml water)
600 g wheat flour type 550 (I used a mixture of types 405 and 550) - divided (300 g + 300 g)
some flour to roll the dough
1-1/2 cubes (60 g ) fresh yeast
25 g sugar
250 ml milk - divided (150 ml + 100 ml)
2 egg yolks (size Medium)
2 level tsp salt (I used only one)
1/2 tsp Lebkuchen spice* (or gingerbread spice) - I prefer using only cinnamon
1/4 tsp organic orange peel flavouring (orange oil + maltodextrin)
200 g raw marzipan
300 g butter - divided (200 g + 100 g)
150 g confectioner's sugar (powdered sugar)
1 packet bourbon vanilla sugar** (= vanilla extract + sugar + ground vanilla bean)

Left: before folding the Stollen; Right: Stollen, after folding it (method: see below)

Method:
  • a day before, soak the raisins, candied peels and chopped almonds in the rum and water in a closed container at room temperature
  • the next day, in a large and deep bowl add 300 g flour, make a well in the centre, crumble the fresh yeast and add 150 ml cold milk and sugar (25 g), stir to dissolve and knead everything together into a smooth but stiff dough
  • let the dough in the bowl rise (proof) at a warm (but not too warm) place covered with a wet dish towel
  • once the volume is doubled, add the remaining (300 g) flour, milk (100 ml), egg yolks (2), salt (1 tsp), the gingerbread spice and orange peel flavouring and knead everything together for a while
  • add marzipan slowly and knead it together
  • knead 200 g butter into the dough (don't let it get warm!)
  • followed by the soaked raisins, peels and nuts until you get a soft and uniform dough
  • let it rise (proof) for another 20 minutes at a warm place
  • roll out the dough on a floured surface into a rectangle, don't knead!
  • fold it twice, first lengthwise (longer side) and then breadthwise (shorter side)
  • let the dough rise (proof) for another 20 minutes
  • divide the dough into two halves now
  • For each dough follow as given below:
    • gently roll out the dough (each half) into a rectangle of 30 x 20 cm2 with a rolling pin
    • make one half lengthwise (30 x 10 cm2) thinner than the other
    • with the lower side of the hand (holding the hand vertically and straight) make a groove (depression) in the middle
    • at the groove fold the thinner side over the thicker one to get the typical shape of a Stollen
  • put both the stollen over a baking sheet (I didn't use any, just nicely sprinkled flour on the try)
  • let them rest for 10 minutes
  • bake in a preheated oven at 200 °C (Gas: 2; Convection: 160 °C) for 45 minutes
  • bake at 175 °C (Gas:3; Convection: 150 °C) for another 15 minutes
  • In the mean time
    • melt the butter in a small pot at the lowest temperature on the stove top and switch off heat as soon as it is done, don't let it get too hot
    • mix vanilla sugar with confectioner's sugar
  • once the stollen are done, brush their tops with the melted butter
  • sprinkle with the sugar generously
  • once it has cooled down a bit, carefully turn it up side down and put the sugar on the lower side as well generously
  • ideally one should let it stand for a week or two before cutting it
  • stollen, if stored properly in a cold and dry condition, can be easily kept for months.
  • while serving make 1 cm thick slices and serve with spiced tea or coffee or to German Glühwein (hot wine punch)
*Lebkuchen spice: it is usually a mixture of ground cinnamon, cloves, coriander seeds, mace. ginger and allspice. It is similar to gingerbread spice.
**To make your own vanilla sugar just put a scraped vanilla bean into an airtight glas jar of plain table sugar and close it tightly. In a few days time you will have a wonderful vanilla flavoured sugar, grind the vanilla bean and add to the sugar, if desired.

Now, I'll begin with what all went wrong or what I did differently with purpose :D :
  1. I didn't use any Rum (alcohol), I don't do it as a rule since a few months, unless it is really a small amount and cannot be done without. The reason is sunny boy. Against regular belief, about 95% of the alcohol remains in the food, even if you cook it for long. I was shocked when I read it in the "Eltern" (German for Parents) magazine the first time about a year back. since then I don't use any alcohol in any form in food. No more wines for us for the coming few years. But, both me and hubby don't mind that at all.
  2. I didn't use the Lebkuchen spice. I dislike it even more than cinnamon, which I have begun to like a little bit after many years of eating it in different sweets, but Lebkuchen spice (gingerbread spice) , no that has to wait till I begin to like it a bit. I used cinnamon and orange oil instead, as oranges are something I very much associate to Christmas too.
  3. I made a big blunder while preparing the dough. I by mistake used 250 g butter instead of 200 g while kneading the dough. It made the stollen much too soft. I was totally puzzled as to how it could be, until I checked the recipe and my ingredients to find the mistake. I tried to add a little bit more of flour (about 50 g) and just about managed to keep the whole thing together. Next time I'll actually use much much lesser than 200 g and take maybe 100 g only. It is more than enough in my opinion.
  4. I used a lot of flour to shape the stollen because of the blunder (too much butter)

As you can see, the Stollen has kind of melted down because of too much butter in it and does not have that typical raised shape it is supposed to have in the centre. But, the big consolation is that it has turned out so lovely! I love the flavour of this Stollen. I guess, for some of you a christmas sweet means the spices, but I have not been able to befriend myself with them as yet. And I found this packet of orange peel flavouring from a Reformhaus, which found its use here and gave it a wonderful flavour and made a very pleasant combination with cinnamon -you see, I did use some spice. :) And Hubby gave the best compliment I could have from him. He said it tastes better than what we buy, and we have been buying all kinds of them in all these years and I'm quite particular about what I buy when it comes to Stollen. I don't buy just anything. And he even said "good.... too much butter is tasting good" All I could was laugh at that. :D

My Verdict: I liked the use of marzipan in the original recipe, which is not always the case for stollen. The butter was a bit too much, but, partly it was my mistake and can be easily reduced, as a stollen is a dense bread and doesn't have to be soft or for that matter fluffy. The amount of sugar you put on top of it is all up to you. I found replacing a small part of the raisins with apricots and dates made a wonderful change and I will surely keep it like that the next time as well. The absence of rum in the raisins made them more delicious to our taste, but it is a matter of taste again. All in all, a wonderful recipe!
Stollen, brushed with butter, before sprinkling sugar on it

I'm sending this not-so-perfectly shaped but tasty Stollen to Zorra's Bread Baking Day # 15 hosted this time by Annarasa.
<span class=

Wising you All  
A Very Happy New Year 2009 !  
May it bring lots of joy, good health, peace 
 and love in your lives!

Some more Stollen recipes:

Zorra's Christstollen at 1x Umrühren bitte
Jude's Stollen at Apple Pies, Patis & Pâté

Saturday, December 6, 2008

Eggless Apple cake with Caramel sauce


I wanted to make this cake after I saw Madhuram's announcement to bake egg less cake with silken tofu. I was totally surprised, as I had never heard before that one could use tofu to replace eggs in baking. For that matter, I had never bothered to know of any egg replacers. But, then my father, who is a vegetarian, would have loved to eat a home made egg less cake, and isn't it much more healthy to replace eggs with silken tofu? Yes of course! The only restriction I have is that I have plan something like this in advance, as I don't get silken tofu locally, but only in the city centre.
I was so curious to know how it would turn out. But, by the time I had got to now of the recipe, I had two weeks of time and I usually bake only on weekends, and somehow didn't get time to bake and missed the event. But, I knew I had to bake it despite that. And I also wanted to use a normal recipe prepared with eggs and replace the eggs with silken tofu. So I did!

I used my recipe - a recipe I got from my friend- the recipe of 2's, which I have modified though to a certain extent. This time I wanted to stick to the original recipe as much as possible.
Here are the changes I have made:
I used 200 g 150 g margarine (no hydrogenated fats) instead of butter
I replaced the 2 eggs with 100 g silken tofu, whisked thoroughly with a hand stick blender
I used 80 g currents and 3-5 apples (enough to cover a 26 cm springform pan) as a topping

And I made a caramel sauce using Ivy's recipe. It was delicious!


This is a very special cake. Special.... once, because it was my first ever effort to replace eggs with something vegan and it also came out so wonderful, a big success! And special also because I feel I have found the perfect egg replacer for such butter cakes I make quite often. But, the bestthing about it is the very special flavour tofu imparted to the cake. I cannot describe it in words, but it was so delicious!
Now, sine tofu is a lot of protein and the flour contains a lot of starch, so this was a result of maillard reaction, so vital to cooking without which what would food taste of?! Now, I'm sorry if I made your mood off with my explanations from chemistry for food. I find it quite fascinating and I assume that you also find it like that too.

Now, to another sweet thing to talk about...
I was loaded with these lovely awards (and a tag - will follow soon) from two wonderful blogger friends - I feel so good saying this :) - Priya and N33ma. I consider myself a comparatively new blogger, although I was surprised to see recently how long I have been blogging now and actually feel not so new any more, but it is all becuse of you all, my blog viewers without whom it wouldn't be half as much fun.
Dear Priya, dear N33ma, thank you so much! Thank you for having thought of me and extending your hand of friendship! It makes me feel good. Tight hugs to you both!


And I got these award also from N33ma. How I love to own them! Thanks a lot N33ma!
I would like to forward these to all my blogger friends, for passing by and taking your time to leave comments and taking notice of my blog - one of thousands of wonderful blogs out there. Please forgive me if I leave out anybody's name, but it is truely meant for all of those who visit my blog, regularly or irregularly:

Anudivya of ...and a little bit more...

Aparna of My Diverse Kitchen

Aparna of Sumi's Weblog

Aparna of Three Mangoes

Curry leaf

Deesha of Vegetable Platter

G. Pavani of Food Lovers

Ivy of Kopiaste

Laxmi Venkatesh of Kitchen Chronicles

Malar Gandhi of Kitchen Tantra

N&A of Delectably Yours

Priya of Priya's Easy N Tasty Recipes

RC of Redchillies

Soma of eCurry

Sunshinemom of Tongueticklers


Now, it maybe that you already have a couple or all of these awards, so it is upto you if you wish to just add me to the list of bloggers who awarded you and leave it at that or pass it on and do the tag of seven.
Just wanted to add: I'm sorry, but I'll do the tag soon, it is right now under process here!

Tuesday, November 18, 2008

Pumpkin Quick Bread


As you might know, I have been wanting to bake or prepare different things which are gluten and casein free for my nephew Advik. I had been asking my sister to give me some ideas about some gluten free recipes which she would like me to make and then finally she mentioned about the pumpkin spice bread. On checking some recipes I found that it is a quick bread which does not require any xanthan gum either. I had most of the ingredients and only needed to buy pumpkin. So, I thought, before the pumpkin season is completely over and I cannot get any of them any more in the market, let me get one and try a recipe of pumpkin spice bread, which I also found very fast.
I did very careful calculations to convert the cup measurements into grams, and planned and checked and rechecked everything, and got going with it this weekend. I had no idea of how it would turn out, not a clue. But, I made the recipe very carefully, and didn't make any substitutions, or only that what was really unavoidable. I went step by step slowly beating everything one by one, taking time for every step carefully. It looked good, almost all the way until I had also added the milk. Then all that I could think of was : "Oh no! That does not look so good.....", as all the fluffyness which I had acieved with all the beating
seemed to go away. So, I stopped beating it and continued with adding the flour and beating the batter side by side. This time I had to hurry up as I had added soda, which, once added to the wet ingredients start working. The end result didn't look bad. So, I quickly poured it into a springform pan and put it in the preheated oven.

Pumpkin Quick Bread

Based on a recipe from a Gluten free recipe source


I converted the amounts using the online weight conversion calculator and have given the weight in grams I actually used, if deviating, at the end.

Ingredients:

2 3/4 cups (480 g) rice flour - I used gluten free whole meal rice flour, coarsely ground
1/4 cup (30 g) soy or gram flour - I used 35 gram flour – Indian besan)
1 heaped tsp turmeric powder (optional -I used it to give it a yellowish tinge)
1/2 tsp. baking powder - I used 1 tsp gluten free cream of tartar baking powder
2 tsp. baking soda
1 1/2 tsp. salt - I used 1 tsp
1 tsp. cinnamon (powdered)
1 tsp. cloves (if using for the first time: use ½ tsp) - I ground about 15 -20 cloves with my coffee mill
2/3 (150 g) cup butter or margarine - I used margarine, free from trans fats and milk products
2 cups (460 g) dark brown sugar - I used 400g whole cane sugar / powdered jaggery and 50 g castor sugar
1 envelop (about 5 g) of bourbon vanilla sugar ( contains ground vanilla bean, vanilla extract and sugar)
4 eggs (medium sized)
1 can (1 lb.) or 2 cups (500 g) mashed squash or pumpkin - I used cooked and mashed fresh hokaido pumpkin
2/3 cup (11 measured tbsp) water or milk - I used soya milk
2/3 cup chopped nuts (I used soaked almonds chopped coarsely)
1/3 cup (60 – 80 g) golden raisins - I had none, so used chopped soft dried-apricots)
1/3 cup (60 – 80 g) raisins

Method:

  • In a bowl mix both the flours, baking powder, baking soda, salt, and spices
  • Cream butter and sugar with a hand blender until it turns from brown to creamish in colour and is fluffy
  • Add eggs one by one and keep beating
  • Add pumpkin and milk one after the other and keep beating
  • Add the flour mix to the pumpkin batter
  • Stir in almonds, apricots and raisins
  • Pour into a greased springform pan or into two 9''x5'' loaf pans
  • If you use a springform pan, then almost double the amount of time will be required, like in my case
  • Bake at 350 ° F (175 °C: 160°C convection) for one hour or until a toothpick or knife inserted in the center comes out clean.

I baked the bread for the first hour at 160°C and then for the next hour at 165 °C in a convection oven, since I had used a larger spring form pan instead of a loaf pan.

Changes I plan to make for next time:

1. reduce the amount of sugar to about 380 g, if using castor sugar, to 350 g
2. reduce the amount of salt to 1/2 tsp; 1 tsp was still too much for my taste
3. leave out cinnamon or replace with half with dried ginger: saunth
4. leave out cloves, gives too strong a flavour, or use ½ tsp


I was quite afraid about how it would turn out. But after about 15 minutes itself, I could see how it had risen, to my happiness. And after another 15 minutes it had risen even more to make me even more happy. I felt that it was a good sign as that could be a good indication of the bread being soft and spongy. But, after an hour when I checked the bread with knife, I found that the centre was all wet and undone. So, I knew it needed to be baked for at least half an hour more. I also increased the temperature by 5 °C. Afterwards when I checked the cake, it was much better but still far from being done, much too soft at the centre. So, another half an hour of baking and then I swithed off the oven and let it stand there as it was in the oven for a while, before I took it out and checked. And yes! The bread looked quite good. Infact much too good! No... wait... it was perfect! As perfect as I could imagine it to be. Soft, and with a nice sponge. Perfect crispy crust. It was just wonderful! It tasted sweet, a bit too sweet actualy , which I realised only later on. But, it did not disturb us. We like to eat things too sweet, if only the health factor wasn't there. :)
But, there was one thing which had started worrying me by the time I had switched off the oven. The smell. I guess some would love it, but I don't like cinnamon and clove in sweet things so much and I could smell it distinctly. I had purposefully kept the recipe the way it is . After all it is pumpkin spice bread. But, my fears were unfounded. The bread tasted very good.
But, still I would reduce the amount of these spices, as I feel that would be more like my bread. And sugar, I felt that it was too much, but didn't feel like making an changes and in the last moment added the remaining sugar as per the calculations.

Hubby was the first person to eat it and found it wonderful. Sonny boy loves this bread, I served it with whipped cream, but to go with the recipe I also wanted to prepare a gluten and casein free icing and found a nice recipe at Sophie's Flour Arrangements. But, as I wanted to make the spread I realised that I had finished off the margarine while making the cake. I had forgotten to stock up on it when I went shopping last time. So, I used butter instead to prepare it and, of course, left out all the spices, as I felt these were enough in the cake this time and only mixed some powdered jaggery with butter to make a simple but lovely icing. The jaggery gives a wonderful flavour to the butter so that nothing else is really needed.
And I also prepared an orange sauce for the cake from one of my cookbooks. Here also I had to use butter instead of margarine. If you wish to have the recipe, then ask me and I'll send it to you. And I sprinkled the butter icing with oraganic lemon zest and poure some orange sauce over it. Yummy!


And now I have to mention one thing: I was planning to send this recipe for Zorra's Bread Baking Day event: Coloured Breads for December, but this turned out to be dark brown as you see. Now breads usually look dark brown and I had hoped for something in yellow or orange. So, I would think, if I were to use regular caster sugar for this, it might actually turn yellowish in colour. Well, to find that out I'll have to wait for a while, before I try this recipe again. But this is one good recipe I would preserve carefully so that when one day the need arises, I can bake it for my my nephew, my dearest Advik.

And this wonderful and successful experiment I am so proud of, I'm sending off to Srivalli's Rice Mela at Cooking 4 All Seasons !!

Wednesday, October 22, 2008

A Birthday, the Day of German Unity and Apple Cheese Pie!

It was Friday, the 3rd of Oktober. It was the Day of German Unity and my sister's birthday. It being a holiday, we had all the reasons to celebrate them - one being an excuse for the other. I always tell my sister, "you see, the whole of Germany is celebrating your birthday!" :D
I wasn't sure of what cake to bake, except that it had to be something with quark, as this time I had bought for the first time lactose free quark for my son, as he is on a lactose free diet. So, it had to be a cheese cake, as we call them here. It is nothing to be compared with the American recipes, as these cakes are called cheese cake because of the quark present in them.
But, then I found that I didn't have any canned fruits at home to use for the cake and none of the fruits I had in the fruit basket were appropriate for a cake, except for the apples. "Apples in a cheese cake.?!" I thought. I had come upon a recipe in one book, but not satisfied I decided to search further in the internet and came upon a lovely recipe - a very tempting one with pictures at Chefkoch.de. It was a time consuming recipe, but the efforts paid off at the end, to my relief. As, this time I wasn't sure of the results.

Apple Cheese Pie
Recipe from Chefkoch.de

Preparation time: 20 minutes
Resting time (includes further preparation time): 1 hour
Baking time: 55-60 minutes
Baking temperature: 170°C (150°C convection)
For 1 Springform (Ø 26 cm)

Ingredients:

Crust:
250 g all purpose flour (I used type 405)
125 g butter
1 pinch salt
30 g sugar
1 egg (I used an egg white in addition)

500 g apples (4-5 apples), peeled, cored and sliced
juice of 1 lemon

Cheese layer:
500 g quark (low fat)- I used lactose free quark
2 tbsp oil
200 g sugar
30 g cornstarch (or any edible starch)
zest of 1 lemon
3 egg yolks
3 egg whites

Top layer (custard):
2 egg yolks
200 ml heavy cream (I used lactose free cream)
50 g sugar
1 envelop vanilla sugar
1/2 tbsp cornstarch (or any edible starch)


Method:
  • Quickly prepare a pie crust by kneading all the ingredients together
  • Place in bowl covered with a clingfilm and refrigerate for 1 hour
  • In the mean time wash a lemon under hot water, zest it and keep the zest aside
  • Sqeeze out the lemon juice, peel, core and cut the apples, sprinckle lemon juice over the slices
  • Beat all the ingredients of the cheese layer except for the egg whites to make a fluffy quark cream
  • beat the egg whites in a deep bowl to make it stiff*(1) and gently fold it in(2) the quark cream to make the cheese layer
  • beat all the ingredients of the top layer together
  • grease the bottom and sides of the springform
  • Roll out the crust and place over it, followed by the cheese layer, then the apples and then the custard (top layer)
  • Bake in the preheated oven at 170 °C (150°C convection) for 55 - 60 minutes(3)
*NOTE:
  1. It is very important that no traces of egg yolk or fats are found in the bowl or on the egg beater while beating the egg whites. They say that the eggwhites should not fall out on turning the bowl upside down
  2. To fold in the egg white, don't use an egg beater, but use a spatula for slow downwards and upwards rotating movelments
  3. I baked the cake at 160°C convection for 45 minutes and kept it in ther oven after swithing it off for another 10 minutes
We all enjoyed eating this delicious cake. It got late by the time I finished it and Rishab just about managed to eat it before he could brush his teeth and go to bed. I purposefully left out the ground or chopped nuts, which I usually like to add to cake crust or batter and also the raisins, as this time both hubby and sonny boy unanimously agreed on not wanting any raisins! I also felt that this cake could do without them. Rich as it already was with quite a number of eggs I am not used to. It was also my luck that I had just bought some eggs and had a good stock on eggs to be able to make this cake. If this cake did not have so many eggs and wasn't so time consuming I would readily make it again. But, now I would ove to try it out with a new ingredient I have discovered at Madhuram's Egglesscooking.com as an egg replacement.
But, this recipe, as it is, is a wonderful recipe and is worth all the efforts put in it. And it is versatile enough that one can easily replace the fruits with anything else of choice. If I were to grade it, it would get an A+ from me and my family.
And I'm sending this over to wonderful Ivy's wonderful Sweet Pies event at Kopiaste.

Sunday, September 28, 2008

Rheinish Apple tart

I was doing my regular shopping at the local drugstore Budnikowsky and found this rack of books donated by people living locally for a good cause. These books are given away for 1 Euro each as a donation and the money goes to Budnianer Hilfe e.V., helping children and their families of the socially and economically unprivileged.
Usually I do like to have a glance over them. This time one book lying in the front attracted my attention and I just couldn't resist not looking into this book with an old but attractive cover. After glancing through it I found a number of interesting recipes and a number of tempting photos. It was a cookbook from the early 70's in quite a good condition. It was a hard bound book with a nice cover photo of a grape tart and, on opening it, I found, though a bit pale, but really thick and strong pages with a number of photos in between.
While going through the book, I came across this delicious and tempting picture of a traditional Rheinish apple tart I liked immediately after seeing the simple recipe. Coming from a historical region Rheinland , earlier a Prussian Province during 1822 till 1946, and is still more or less a defined region which is now a part of the German state North Rhein-Westphalia (in German: Nordrhein-Westfalen) and includes some famous cities like Cologne and Bonn or the historic city of Aachen, to mention just a few.
The whole region including its neighbouring regions are well known for their historical and natural beauty and the castles found apparently on almost every hill there.
Rheinland also happens to be the birthplace of many famous people. To name a few, Beethovan (does he need introduction?!), Adenauer - the first Chancellor of Germany, Heinrich Böll - a Nobel price winning writer, and the more recent ones which many of you might know: Michael Schumacher (Formula 1? Ferrari? For more details, go here) and Heidi Klum!

So, it is not surprising that the region is well known for its culinary specialities as well. One of them being this simple, yet delicate, recipe of an apple tart I found in this book. It is called Rheinische Apfeltorte in German and "Appeltaat" in the region of its origin - Rheinland.

Servings : 12
Preparation time: 45 minutes
Baking time: 35 minutes

Ingredients:

Shortcrust pastry:
300 g all purpose flour
100 g sugar
1 packet vanilla sugar ( or 1 tsp vanilla essence)
1 pinch salt
1 egg
200 g butter or margerine, cold and cut into small cubes
flour to roll out the pastry

Filling:
100 g currents
750 g tart apples (I used james grieves)
3 tbsp sugar (60 g)
1/2 tsp cinnamon (I left it out)


Method:

  • add the flour in a large bowl, make a well in the center and add the remaining ingredients
  • knead the ingredients of the pastry together into a ball and keep in the refrigerator covered for 30 minutes
  • in the mean time prepare the filling: cover the currents in boiling water and soak for 5 minutes in a bowl and drain
  • peel, core and slice the apples, cover with sugar and cinnamon mixture (I simply mixed sugar with the apples)
  • roll out the dough on a floured surface into a 1 cm thick pastry
  • line the bottom and sides of the spring form with the shortcrust pastry
  • put the currents in a layer over the pastry , leaving out a small portion to mix with the apples
  • arrange the apples on top either in circles or in parallel rows or as per liking
  • bake for 30 minutes in a preheated oven at 200°C
  • take it out of oven, once done, and let it cool down a bit beofre cutting into pieces
  • serve warm or cold, which tastes equally good.
I had a small portion of the pastry left which I sprinkled on top of the fruits.

See Rheinish Apple Tart on Key Ingredient.


We ate the first round of the tart immidiately after taking it out of the oven. I have no words to describe how good it was. The apples just melted in the mouth. It is a wonderful variety of tart apples especially good for baking, but that it was that good was totally unexpected for me. The currents rounded up the taste of the apples so well. I was happy later that I had just the right amount left, as I don't always have them at home. But a much better choice than raisins. And equally good was my decision to soak them properly till they became softer.

This tart eaten cold tasted as good. And my verdict: It was hea.........venly!

The details of the Book:
"Backen leicht gemacht"
Kochkunst Bibliothek
(Sonderausgabe)

Tuesday, September 16, 2008

Polish Apple cake....


.....with apples from HOME!

I had a huge batch of apples (James Grieve) from my own garden.


These are a lovely variety of apples for baking or in any form as a dessert, but as good for eating fresh or in a salad, for example. They are quite rich in flavour and have a nice tartness which I feel is a must for an apple to taste good. I don't like those sweet varieties of apples which just taste sweet and don't seem to have any other flavour.
So, to my happiness this is a wonderful variety of an apple tree I have at home, which was there before we moved into this house. It is still a young plant, maybe 10 years or so, but had been strongly cut really short as it was growing against a wall and we moved the poor plant to a place where it got enough room to grow properly. And it is growing really fast now. I am learning to take care of these garden plants, which I don't find as easy always and this time I learned a few basic things about taking care of apple trees. I always find pruning a difficult task. You need not only some experience , but also some good guidelines to do it. Let's see How I manage this time.
So, two small buckets full of nice looking apples was more than I had expected. It was a weekend and hubby took out his ladder and did this job for me. We ate a couple of them just like that and enjoyed it a lot. It was still a bit early for them, but that is how I like them, whe they are still crispy and juicy!


And the next day I baked the cake with the recipe I have made a couple of times of a Polish apple cake from my cookbook I own almost since I came to Germany and which not only taught me how to bake, but also learn German! I have have gone through many baking adventures with it, mostly successfully!
I made some changes to the last time. I didn't use any rum for the raisins 'cause of my son, and neither milk - just some hot water to soak them. I didn't use any currents either. This time I also used ground almonds instead of slivered or chopped ones. And made the cake on a baking try this time.
I also didn't add any cinnamon or cardamom to the cake this time on my hubbys request. And for the same reason added raisins to only half of the cake and the remaining without them. He prefers the cake without them. And since my 3 year old son wasn't sure if he wanted them or not - "yes, I want them..uhhh....no, no, I don't....Ok I want...."... "OK, Rishab, you'll get whatever you want, once the cake is done". I like them in the cake, by the way. :)

And the cake was a dream! I love this thin layer of "Baiser" (Meringue, in English) as the call it here on top of the cake. Nothing can beat this flavour. And with it you also don't require any whipped cream, as the Baiser takes care of that. It is a complete dessert, as it is. It rounded up our weekend meal very nicely. One cake I can only highly recommend.


This one goes to the Andrea's Grow Your Own event being hosted by Denise of Chez Us this time.

Wednesday, July 30, 2008

Caramelised pear and apple ginger cake

This is one of those "one of its kind" cakes. Dellllllicious! The contrasts of spicy fresh ginger and sweet apples blend so well togehter in this cake and give it a distinct flavour. All of us enjoyed it thoroughly last Saturday. Chonu, my hubby, enjoyed it to the full - you won't believe, but I actually got many compliments from him, my "not so easy to please with food" hubby, for this - now, that makes it all the more special! :)
Now I need to credit two people for it. One is Sophie , the chief Blogger at The Back Burner
who found this recipe and posted it at The Back Burner and the other, of course, Lisa of Spicy Icecream who posted the recipe at her blog.
I admit, the pictures don't look as beautiful as the the cake tasted, but I did not follow the recipe as exactly and used my own measurements partly. Since hubby prefers apples to pears and also because I didn't have enough pears - I'm sure with pears it would taste great - I added two apples to the two pears I had. But, I knew it would make as good a cake. So, I didn't even see it as a compromise. And it surely wasn't one. It tasted great! Although, I am a bit at loss as to why it rose so much in the middle and not evenly. It happed in the later half of baking in the oven for sure. So, it was not eay to hold it all together while taking it out when it was still hot. I served it with whipped cream to which I had added some whole cane sugar which I had also used in the cake instead of brown sugar and which gave the cake and the whipped cream a wondeful flavour.


The original recipe is here.

Ingredients:

Topping
  • 75g soft butter
  • 1/2 cup whole cane sugar
  • 2 medium pears, peeled, cored and sliced thin, lengthwise
  • 2 medium apples, peeled, cored and sliced thin, lengthwise
  • 1/2 tsp ground cinnamon (I had none at home)
Cake batter
  • 1 cup oil (like sunflower)
  • 3 eggs
  • ¾ cup whole cane sugar
  • 2 tablespoons fresh ginger, peeled and finely grated
  • 2/3 cup golden syrup (it is similar to molasses)
  • 1 ½ cups buttermilk (I used yoghurt)
  • 3 cups plain flour
  • 3 teaspoons baking powder
  • ½ teaspoon salt
Method:
  • Prepare topping by adding the cut apples and pears with whole cane sugar tothe melted butter in the pan. Pour into the spring form lined with baking paper at the base.
  • Preheat oven to 140°C (convection; regular: 160°C). In the mean time prepare the batter by beating together first the wet ingredients and them mixing the dry ingredients separately before adding to the batter and beating further.
  • Pour batter over the cake tin with the fruit topping at the base.
  • Bake for 1 h 45 min or until a skewer or knife inserted into the cake comes out clean.
  • Let it cool down for 10 minutes and then turn upside down, holding the plate to be used on it - do this very very carefully!
  • Serve with whiped cream or as it is.
Note: I found the salt to be a bit too much for my taste and hubby agreed on that point. So, I plan to add only half the quantity next time.
Although I would love to know what role salt plays in a cake, have heard of its use in cakes a number of times.

Tuesday, July 22, 2008

Lemoniest Lemon Cake!

I baked this cake yesterday. Again a very easy and simple cake like I have given before too. I needed to take it to the company I'm working at since the beginning of this month. I got this recipe from a very good ex-colleague of mine who actually knew it by heart and wrote it down for me on a paper about 7 or 8 years ago, which has been so dear to me and I have kept it very carefully in my folder with all the good recipes I have tried and tested. Now it is time to put it down here in my blog. And this is really so easy to remember by heart that once you have made it a couple of times, then there is no need for a paper to look at actually.
This is one very summery, lemony recipe which I always make at least once during summers. As it is a not so heavy and a very quick recipe. And if you are a beginner, then this is just the recipe for you, as I feel that one can make it blindfolded.
And the best thing about it that, despite it being so easy, it is so very delicious that I always have people asking for its recipe and lots of praises too. I think the cake deserves it too.


It is very rare that I do not modify any recipe to my taste or needs when I make it, even if it only a little bit or the first time of making it. But this is so perfect that there isn't much that I can do to change or improve it. It is just the most delicious and easiest recipe of a cake that I have ever got hold of.
So, Elke, thank you so much for this wonderful recipe!

Preparation time: 15 minutes
Baking time: 30 minutes
Temperature: 180°C convection oven (200°C electric)

Ingredients:

Cake Batter:
4 eggs
3 cups all puorpose flour
2 cups sugar
1 cup oil, a neutral one
1 cup sparkling water (or lemonade or plain water is as good)
1 envelop baking powder (I think it is around 20 g or 3 tsps)
1 envelop vanilla sugar or vanilla extract (2 tsp)

1 lemon, organic or untreated, to use the zest of lemon and the juice

Sugar Icing / Frosting:
1 lemon, organic or untreated
250 g (1 packet) Icing sugar (Confectioner's sugar)

Method:
  • Preheat oven to 180°C convection (200°C electric)
  • Mix flour with the baking powder in a bowl
  • Add sugar, eggs, oil, vanilla extract and the sparkling water to it and beat into a smooth and runny batter with a hand or a stand mixer
  • Pour the batter on a baking try or a large jelly-roll pan and bake in the oven for 25 minutes and checking with a knife and, if required, baking further
  • In the mean time remove the lemon zest and keep aside (make sure to wash the lemons in hot water before using)
  • Prepare the sugar icing/ frosting with the juice of one lemon and 250 g icing sugar
  • Add the juice slowly and carefully, spoon by spoon, mixing in between to make not-too-thin frosting and keep aside
  • Once the cake is done, take it out and sprinkle with the juice of one lemon
  • While the cake is still warm, pour the frosting on the cake and spread it very slowly and gently with a spatula on the cake (as the lemon juice makes the surface soft)
  • Sprinkle the zest over the icing on the cake and cut into appropriate sized pieces ans serve warm or cold.
The cake can be kept for up to 5 days in the fridge in an airtight container. Before you can stack the cake pieces one over the other, let the cake cool down completely and use butter paper which has been rubbed with just enough butter to soak the butter in the paper. This will prevent the icing from sticking to the paper or foil or wrap used otherwise.
So, as they would say in German: Guten Appetit!

Monday, July 14, 2008

Mini Mango Almond Cake and Muffins

This sunday, I had a nice big mango lying in my fruit basket on my kitchen window which looked quite ripe now, just waiting to be eaten. Initially I had thought of combining it with strawberries and offering it as a dessert along with quarkspeise (a German curd-preparation made with the addition of sugar and whippedcream and eaten with fruits), but then Rishab and Chonu got to eat the strawberries as a late morning snack already.
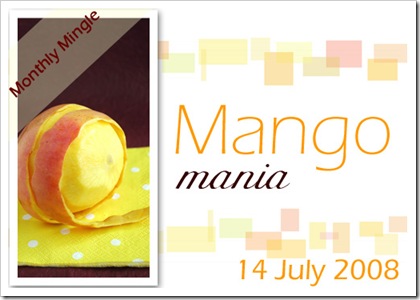
So, I decided upon a mango muffin recipe as an afternoon dessert. This is the first time that I used a mango in muffins. And I must say, it was so tasty that it did not even need any sugar or chocolate icing on top. It tasted just soooooo good!Since when I make muffins, my son is also always there to "help" me, as he always insists upon it to which i cannot say no! And now that he recently got his own baking set of baking tins, cookie cutters and a rolling pin. He always wants to use whatever he can. So, we put a part of the muffin dough into a small cake tin too. Which looked so beautiful that I actually decided upon sending it to this months Monthy mingle: Mango Mania taking place at Meeta's blog. I don't think we will win the prize after seeing such tempting recipes there, but it is worth the mingle!
This is the same recipe as I have given in my basic muffin recipe . But I will write it down once again here.

Preparation time: 25 minutes
Baking time: 25- 30 minutes

Dry Ingredients:
250 g all purpose flour
2 1/2 tsp baking powder
1/2 tsp baking soda
50 -60 g (1 1/2 -2 oz) chopped almonds

Wet Ingredients:
1 egg
200 g yoghurt
75 ml sunflower oil
125 g sugar
1 envelop buorbon vanilla sugar (or use a teaspoon of vanilla extract)
200 g (1 large) mango, diced; keep a few pieces aside for decoration


Method:
  • Mix the dry ingredients evenly
  • In a large bowl stir, except for the mango, the wet ingredients together for short
  • Add the mango and the dry ingredients to the bowl and mix everything for short with a spoon, just to make everything wet
  • DO NOT STIR anymore!
  • Quickly spoon the batter into the muffin tins and bake at 165 °C in convection oven (175 °C electric) for 25-30 minutes
  • Check with a knife after 25 minutes if they need to be baked further or not.
  • Serve warm
  • If desired, you can always serve these with some whipped cream or chocolate sauce and a few pieces of fresh mango
So, this is my entry to Meeta's Monthy Mingle: Mango Mania . A very spontaneous decision, as I think my son and I have done a good job at making these yummy muffins. And don't they look beautiful! :)

Friday, June 20, 2008

Apple Cake


This is a recipe of a Polish Apple Cake from my precious baking book I have. I baked it for a old colleague, also a good friend, who came to visit us with his family. We met after almost a year.
And despite my fears, it was appreciated a lot.

Preparation time: 1 1/4 hours
Baking time: 45 minutes
Baking temp.: 200°C (180 °C convection oven)

Ingredients:
The values in brackets are for a round (26 cm Ø) tin

200 g (150 g) soft butter
100 g (75 g) sugar
3 (2) eggs
4 (3) tbsp milk
1 vanilla bean or 1 tsp essence
225 g (150 g) all purpose flour
50 g (30 g) edible starch (e.g., cornflour, rice or potato starch)
50 g (40 g) raisins
50 g (40 g) currents
3 (2) tbsp Rum (I took hot milk instead)
50 g (35 g) sugar
750 g (500 g) sour apple varieties (Boskop, Granny Smith)
1/2 untreated lemon
1/2 tsp Cinnamon ( I used 2 pods of green cardemom, the seeds ground)
50 g (35 g) sugar
100 g (50-75 g) chopped or slivered almonds

Method:
  1. Beat together butter with sugar till fluffy
  2. Separate egg into egg white and egg yolk
  3. beat into the buter: egg yolks, half of vanilla (essence) and milk
  4. Mix flour, starch and baking powder. Add slowly to batter while beating
  5. Wash the raisins and currents in hot water and soak in Rum or hot milk
  6. Wash, cut and peel the apples into thin small or large slices and mix with lemonjuice
  7. Mix together the raisins, apples, spices and sugar
  8. Preheat oven to 200°C (180°C convection).
  9. Grease the baking try (or round pan) with butter and spread the batter over the pan with a spatula
  10. Spread the apple mixture over the dough and bake for 25 minutes
  11. Beat the egg white with the remaining sugar with clean blades of an electric beater until stiff. Add almonds caredully
  12. Spread over the cake, once done and bake further for 20 minutes on the lowest position.

Sunday, June 1, 2008

Pineapple Cake


I made this cake together with my son on my birthday. It was a friday, so he was at home and we just wanted to have some fun, so we thought of making a cake togehter, which he also enjoys a lot.
Unfortunately, when I cut the pineapple, I found that half of it was already too ripe- it showed dark greyish yellow transluscent areas in the lower half. It tasted very good otherwise and didn't show any signs of fungal infection at all. So, we used the rest of the pineapple half. It had been lying since more than 4 days in my kitchen. maybe I should have stored it in the fridge, but somehow I find it too bulky for that.
Anyways, I had a tin of pineapple at home, so I did not worry. It is one of the things which you would always find in stock in my pantry!

The recipe of the cake was basically the basic cake recipe I have.


Preparation time: 30-35 min.
Baking time: 45 min.
Temp.: 200°C (390°F) electric oven / 180°C (355°F) convection oven

My proportions for the ingredients:
  • 2 eggs
  • 150 (5 oz) sugar
  • 150 g (5 oz) butter
  • 1 pk. vanilla sugar
  • 250 g (8 1/2 oz) flour
  • 3 tsp baking powder
  • 1 pineapple, peeled, cored and cut into round slices or a tin of pineapple slices
Method:
  • Mix the baking powder with the flour in a bowl.
  • beat the eggs, butter, sugar and vanilla sugar together with an electric hand mixer in another bowl.
  • Add the flour to it and beat further to make the batter light and fluffy.
  • Put baking paper at the bottom of a round baking tin 26 cm), grease it and the sides with butter.
  • Put a layer of the round pineapple slices over it. Let the excess juice drip off from the slices in a colander before putting it in the cake.
  • spread the batter carefully with a spatula on the slices
  • If you wish, put some more pinaapple slices on top and press them down a bit.
  • Bake in the oven for 45 minutes.
  • Serve with 250 g (9 oz) whipped cream, flavoured with vanilla sugar and swetened with 2 tbsp of sugar.

Thursday, May 29, 2008

Basic cake recipe

I got a recipe froma friend of mine which is very easy to memorise. It helped me a lot in my baking efforts. After having made a couple of trials with it I was confident enough to make varaitions which lead me to make appropriate changes and am now surprised at the easiness of baking. Of course, simple baking as it follows.
I will first write down the recipe I got fom my friend. It is called:

The Recipe of 2's

Ingredients:
  • 2 eggs
  • 200g (7 oz) sugar
  • 200g (7 oz) butter
  • 1 pk. vanilla sugar
  • 200g (7 oz) flour
  • 1 packet of baking powder (as per the manufacturer, the amount needed for 500g of flour)
  • fruits of choice as topping
My proportions for the ingredients:
  • 2 eggs
  • 200g (7 oz) sugar
  • 150 or 200g (7 oz) butter, both the amounts are possible
  • 1 pk. vanilla sugar
  • 250g (8 1/2 oz) flour
  • 3tsp baking powder
  • fruits of choice as topping
Method:
  • Mix the baking powder with the flour in a bowl.
  • beat the rest of the ingredients together with an electric hand mixer in another bowl.
  • Add the flour slowly to it and beat further to make the batter light and fluffy.
  • spread it with a spatula on a greased round tin (Ø 26cm) or a square tin of similar size.
  • Cover with fruits
  • Put fruits as per desire and amount on top of the cake. Like berries or apples (peeled, cored and sliced). Apples make a lovely combination with walnuts. Or just add some nuts and raisins or dry fruits to the batter. Roasting the nuts sligtly before adding to the cake gives a good flavour.
Preparation time: 30-35 minutes
Temp.: 200°C (390°F) electric oven / 180°C (355°F) convection oven
Baking time: 45 min.

Yesterday I baked a cake for my hubby, which he wanted to take to the office. An apple cake. But like so often I forgot to take a picture. But there will be a next time.

Tips:

  • use 200g (7 oz) flour and 50 g (3 1/2 tbsp) cornflour or any other edible starch
  • add some teaspoons of milk if the batter is too stiff. It should be easy to spread with a spatula.
  • I also like to add 50g of powdered or finely chopped almonds (or any other nuts) when I have them at home.
  • serve cake with whipped cream. To whip add some sugar to the cream and a few drops of vanilla flavour(optional) and lemon peel (buy readymade, if not sure about pesticides).